Connect to android device screen from ubuntu pc

Scrcpy is a software to connect to your android device (phone or tablet) from your ubuntu pc.

It is really fast and stable.All you have to do is install the software with using apt

$ sudo apt install scrcpy

and then connect your android device to your pc via usb cable.Enable adb usb debugging.and run the tool

$ scrcpy
INFO: scrcpy 1.12.1 <https://github.com/Genymobile/scrcpy>
/usr/share/scrcpy/scrcpy-server: 1 file pushed. 7.9 MB/s (24773 bytes in 0.003s)
INFO: Initial texture: 1080x1920

and Thumbs up! they really made a good software.I appreciate.Thanks to Genymobile!

Github page https://github.com/Genymobile/scrcpy

List access or error log files with their sizes plesk hosting servers

List all access log files;

find /var/www/vhosts/*/logs/error_log -exec ls -la {} \; | awk '{print $5 " " $9}' | sort -n

List all error log files;

find /var/www/vhosts/*/logs/access_log -exec ls -la {} \; | awk '{print $5 " " $9}' | sort -n

For access logs,there are also other access log files in that directory.For example,access_ssl_log,access_ssl_log.processed and more.So to list all files that starts with access,use wildcards like;

find /var/www/vhosts/*/logs/access* -exec ls -la {} \; | awk '{print $5 " " $9}' | sort -n

Unable to change hosting php version in php selector for Cloudlinux

In this case,problem is file permissions for php.ini file related that you want to switch php version.

Login to shell and change the group owner of related file.Sample command is for php 7.4

chgrp linksafe /opt/alt/php74/etc/php.ini

Change compression type for Plesk backups

As a new feature,Plesk picked up zstd compression method for backups.If you want to create backup files with classic method you can edit the panel.ini file in two way

1. Go to Extensions ->Install and activate panel editor extension and open the editor in my extensions section

Select the editor and add these;

[pmm]
compressionMethod = deflate

2.Login to shell.Open /usr/local/psa/admin/conf/panel.ini file with your favorite editor like nano or vi.Add theses line to the appropriate place

[pmm]
compressionMethod = deflate

Note.You may already see [pmm] section.In this case you just add compressionMethod = deflate

below the [pmm] section.

Most Used Linux Commands For File Compression

Gzip

Compress a file with gzip

$ gzip filename

Compress and keep the original file

$ gzip -c file > file.gz

Compress all files in a folder

$ gzip -r foldername

Tar.gz

$ tar -czvf filename.tar.gz directory

ZSTD Compression

Install first the package,

$ sudo apt install zstd (Debian/Ubuntu)

$ dnf install zstd (Centos,AlmaLinux,Fedora,Redhat)

Usage:

to compress a file :

zstd example.txt

Using with tar:

tar --zstd example.tar.zst example/

ZSTD Uncompression

tar --use-compress-program=unzstd -xvf archive.tar.zst


How to Install Maxmind Geoip module for Litespeed

Previously I wrote a document that how to install Maxmind module for Apache web server.

Also I wrote how to block requests from countries wherever you want.

After four years I think you might need to this for litespeed because lots of hosting companies use that.

First of all,before install,you need same thing :the maxmind country ip database here (You should login first to https://www.maxmind.com


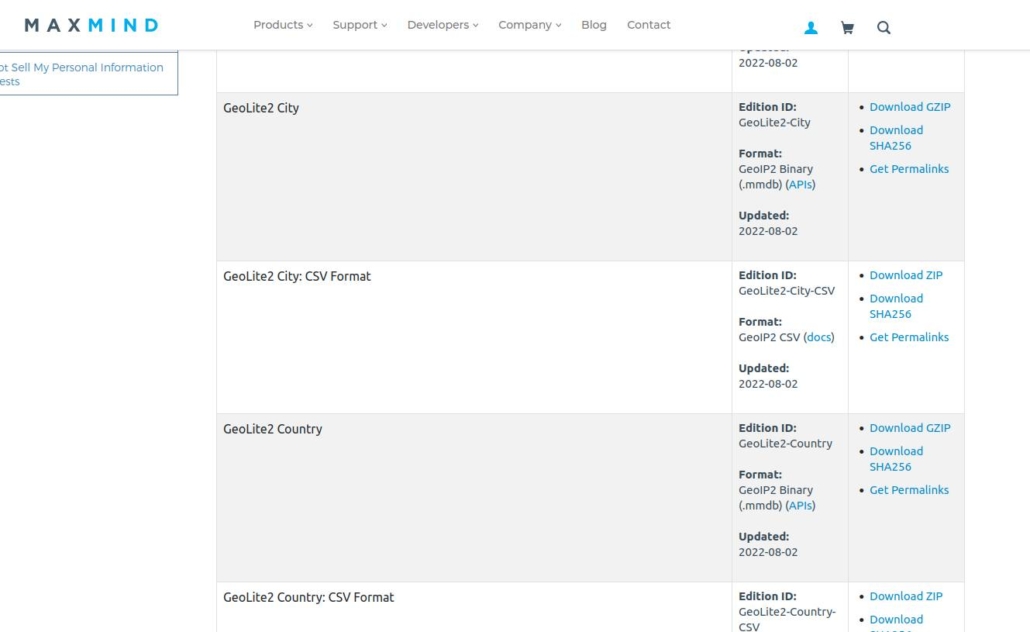
First create a folder named GeoIP under /usr/local/share/

Download the gzip or tarball and extract to /usr/local/share/GeoIP/GeoLite2-Country.mmdb<–sample name.we will use this path in litespeed admin console.

After login to your litespeed admin console->Configuration->Server

In general tab,you will see geoip lookup setting.So you enable it.

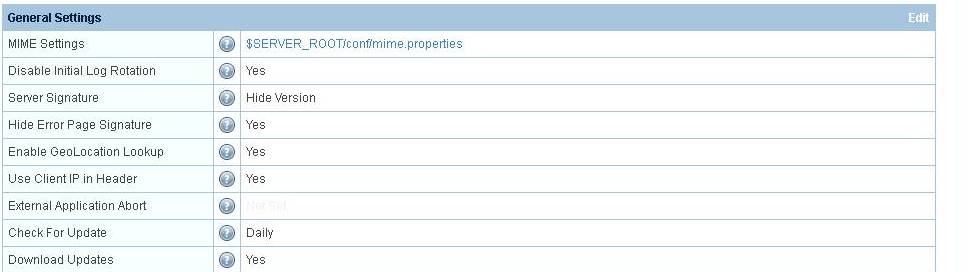
And find the details of maxmind settings section

You see this is already configured.Yours will be empty.Ignore that.So you need to add some details like below;

File path must be true.DB name is really important and variable section is mandatory field.it is better to set as is.and save.Restart the litespeed server.

After you do that You verify it is installed correctly.Therefore you must see geoip variable in phpinfo page.So you upload a php file that includes phpinfo and load it from your browser.

If you see that server variable then you can create some rules about deny some requests;

Assume you use Centos or Cloudlinux,go to /etc/httpd/conf.d and create a file named maxmind.conf (name is optional but it should ends with .conf)

maxmind.conf

<IfModule LiteSpeed>
GeoIPEnable On
</IfModule>

<IfModule mod_geoip.c>

<FilesMatch “wp-login.php|xmlrpc.php”>

SetEnvIf GEOIP_COUNTRY_CODE ^(US) AllowCountry
######Deny from env=BlockCountry
Allow from env=AllowCountry
Deny from All

</FilesMatch>

<LocationMatch “^/”>

SetEnvIf GEOIP_COUNTRY_CODE ^(US) AllowCountry
######Deny from env=BlockCountry
Allow from env=AllowCountry
Deny from All

</LocationMatch>

<LocationMatch “^/admin”>

SetEnvIf GEOIP_COUNTRY_CODE ^(US) AllowCountry
######Deny from env=BlockCountry
Allow from env=AllowCountry
Deny from All

</LocationMatch>

<LocationMatch “^/wp-admin”>

SetEnvIf GEOIP_COUNTRY_CODE ^(US) AllowCountry
######Deny from env=BlockCountry
Allow from env=AllowCountry
Deny from All

</LocationMatch>

</IfModule>

1.First section enables the geoip lookup

2.Filesmatch directive matches request to your spesific file name regardless of where.So it can be / or /abc.

3.Locationmatch is a folder generally

So according to these directives Accessing outside of US to your site root /,/admin and /wp-admin will be blocked as well as wp-login.php and xmlrpc.php

You can allow multiple country by adding their iso codes with this syntax (I guess)

SetEnvIf GEOIP_COUNTRY_CODE ^(US|FR|DE) AllowCountry

After you finish your configuration file,save it and restart litespeed.

To verify,Opera browser or open proxies will help you.